
Quick answer
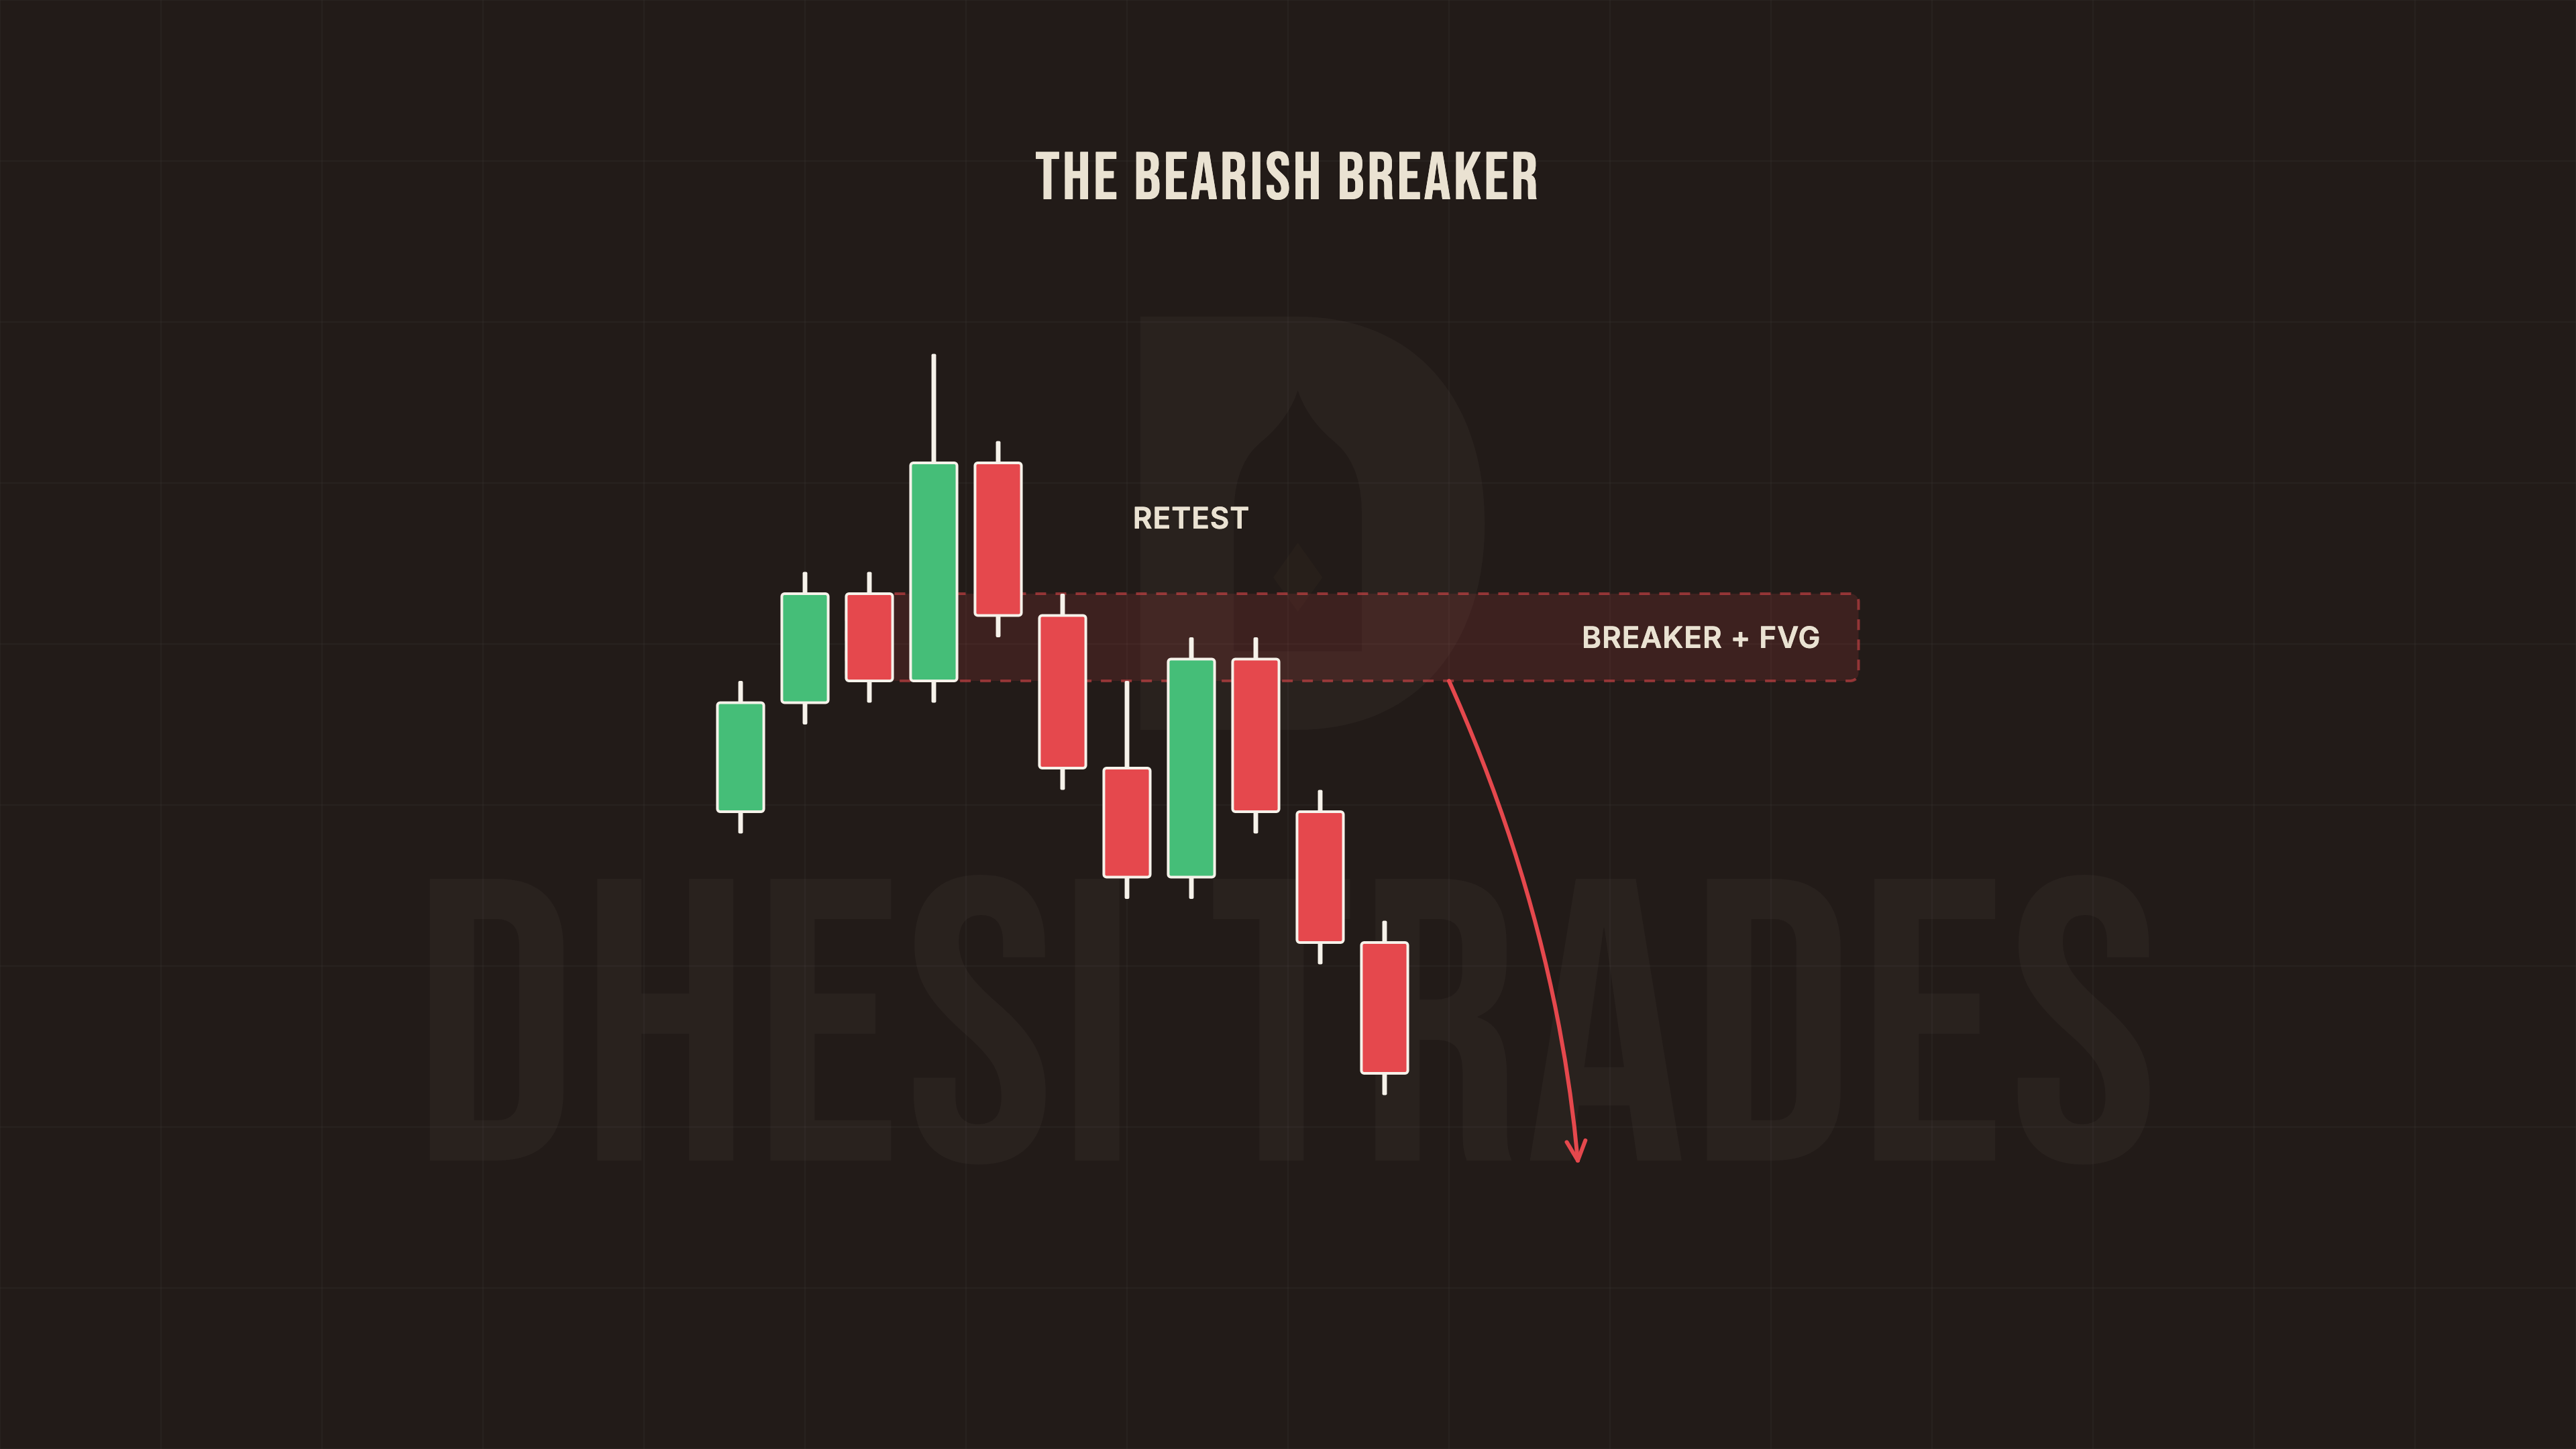
A breaker block is an order block that price trades back through. On the move up, the market sweeps buyside liquidity and leaves an order block behind. When price comes back down through that block and taps it from the other side, you get a bearish breaker. Stack a 5-minute fair value gap on the same zone and that retest becomes a high-probability continuation entry, straight down into sellside liquidity.
Introduction
I trade more than one entry model, and this is one of my favorites. It is clean, it is mechanical, and once you can spot it you will see it every session.
The structure is always the same. Accumulation, manipulation, then a sharp move. Liquidity stacked as a target, price retraces, and the breaker plus the gap give you the entry on the way to that liquidity. Let me walk it step by step, the same way I drew it in the short.
We have a bearish breaker plus a fair value gap on the 5-minute timeframe. This is your unicorn setup. A very high-probability area for continuation.
Kevin Dhesi · @dhesi_trades
What is a breaker block?
A breaker block is a failed order block. The sequence is simple:
- Price rallies and sweeps buyside liquidity, the equal highs sitting above.
- That rally leaves an order block behind.
- Price reverses and trades back down through that order block.
- The retest of the now-broken block, from underneath, is the bearish breaker.
The block flipped polarity. What helped price up is now resistance on the way down. Smart money already showed its hand on the sweep.
The Bearish Breaker Entry
 Dhesi Trades
How the breaker entry forms, step by step
- Mark the buyside liquidity above. Equal highs, an old session high, a clean swing.
- Watch the rally sweep that liquidity. The sweep is the manipulation.
- Identify the order block the rally left behind.
- Wait for price to trade back down through that order block. Body close, not a wick.
- Find the 5-minute FVG that prints on the move down. Breaker plus gap is the zone.
- Enter on the retest of the breaker plus FVG. Not before.
- Stop goes above the breaker. Target the sellside liquidity below.
Why breaker plus FVG is the high-probability version
A breaker on its own is solid. The version I size into stacks a fair value gap on the exact same zone. When the breaker and the gap overlap, you get two reasons to reject from one tight area:
- The broken order block says smart money flipped direction.
- The fair value gap is an inefficiency price still wants to rebalance.
Two confluences, one zone. That overlap is what makes it the unicorn. It works the same in reverse for longs. Sweep sellside, leave an order block, break back up through it, then buy the bullish breaker plus gap.
When I skip the breaker
- No clean liquidity sweep. If the rally never took obvious buyside, there is no manipulation to trade against.
- No fair value gap on the break. A breaker with no gap is a weaker zone. I wait for the overlap.
- No higher timeframe context. A breaker against the bigger picture gets run over. Trade it with the trend, into liquidity.
- Only a wick through the block. A wick is not a break. I need the body to close through.
Bottom line
Sweep, order block, break, retest. That is the whole model. The breaker tells you smart money flipped, the fair value gap tells you where, and the equal highs or lows tell you the target. No magic touch, no extra explanation. Mark the liquidity, wait for the break, enter the retest.
If you want to watch the breaker entry run in real time, the live stream is free, every weekday morning.
I love trading the bullish side and the bearish side. These are great entry models, and they get you very clean entries down into external liquidity.
Kevin Dhesi
Quick check
Three questions, straight from this article. See if it stuck.
0 of 3 answered